Search Resources
WooCommerce Currency Converter Widget Pro 2.2.1
Unlocking the Power of WooCommerce Currency Converter Widget Pro In the ever-evolving world of e-commerce, staying competitive means not only offering a wide range of products but also ensuring that your online store is user-friendly and caters to a global audience. One essential aspect of this is providing a seamless currency conversion experience for your customers. This is where the WooCommerce Currency Converter Widget Pro comes into play. Understanding WooCommerce Currency Converter Widget Pro What is WooCommerce Currency Converter Widget Pro? WooCommerce Currency Converter Widget Pro is a versatile and powerful tool designed to enhance the shopping experience on your WooCommerce-based online store. It’s a plugin that simplifies the process of currency conversion, making it easier for customers from around the world to browse and make purchases on your website. How Does It Work? This plugin integrates seamlessly with your WooCommerce store, allowing it to automatically detect the user’s location and display product prices in their local currency. It fetches real-time exchange rates, ensuring that customers always see accurate prices. Plus, it offers an intuitive currency selection widget that enables users to switch between different currencies effortlessly. Benefits of Using WooCommerce Currency Converter Widget Pro 1. Improved User Experience One of the primary advantages of this plugin is its ability to enhance the user experience. Customers appreciate the convenience of viewing prices in their familiar currency, which can significantly boost your conversion rates. 2. Global Reach Expanding your customer base globally becomes much more accessible when you provide localized pricing. With WooCommerce Currency Converter Widget Pro, you can tap into international markets without the need for multiple storefronts. 3. Real-Time Exchange Rates The plugin ensures that exchange rates are always up-to-date, guaranteeing transparency and accuracy in pricing. This builds trust with your customers, as they know they are getting a fair deal. 4. Easy Setup Installing and configuring the plugin is a breeze, even for those with limited technical knowledge. You can have it up and running in no time, without the need for complex coding. 5. Customization Options Tailor the appearance of the currency selection widget to match your store’s aesthetics seamlessly. This customization adds a professional touch to your website. 6. Increased Sales Ultimately, WooCommerce Currency Converter Widget Pro can lead to increased sales and revenue for your online store. By eliminating currency-related barriers, you make it more likely that visitors will turn into paying customers. How to Install and Set Up WooCommerce Currency Converter Widget Pro Getting started with this powerful plugin is straightforward: Step 1: Purchase and Download Visit the official WooCommerce website or a trusted plugin marketplace to purchase WooCommerce Currency Converter Widget Pro. Download the plugin file to your computer. Step 2: Install the Plugin Log in to your WooCommerce-based WordPress dashboard. Navigate to the “Plugins” section and click on “Add New.” Then, click on the “Upload Plugin” button and select the downloaded file. Finally, click “Install Now.” Step 3: Activate the Plugin After installation, activate the plugin. You’ll now see a new tab in your WooCommerce settings dedicated to currency conversion. Configure the plugin according to your preferences. Step 4: Customize the Widget In the same settings section, customize the appearance of the currency selection widget to align with your store’s branding. Conclusion In a world where e-commerce knows no borders, the WooCommerce Currency Converter Widget Pro is your passport to a global customer base. By simplifying currency conversion and improving the overall shopping experience, this plugin can help your online store thrive in a competitive market. Don’t miss out on the opportunity to expand your reach and boost your sales. Unlock the power of WooCommerce Currency Converter Widget Pro today!
WooCommerce Coupon Campaigns Premium 1.2.25
WooCommerce Coupon Campaigns Premium: Boost Your Sales with Effective Strategies In the highly competitive world of e-commerce, attracting and retaining customers is paramount. One powerful tool at your disposal is WooCommerce, a robust e-commerce platform that seamlessly integrates with WordPress. In this article, we will explore the world of WooCommerce Coupon Campaigns Premium and how they can supercharge your sales. From setting up enticing discounts to crafting compelling offers, we’ll delve into everything you need to know to make your online store thrive. The Power of Discounts Understanding WooCommerce Coupon Campaigns WooCommerce Coupon Campaigns are a versatile feature that allows you to create a wide range of discount offers. Whether it’s a percentage off, a fixed amount, or free shipping, you have the flexibility to entice customers in various ways. Types of Discounts Percentage Discounts Fixed Amount Discounts Free Shipping Buy One, Get One (BOGO) Deals Product Bundles Crafting Effective Coupon Campaigns Setting Clear Objectives Before launching any coupon campaign, define your goals. Are you aiming to increase sales, clear out excess inventory, or attract new customers? Knowing your objectives will help tailor your campaign. Target Audience Identifying your target audience is crucial. Are you targeting first-time buyers, loyal customers, or specific demographics? This information guides your campaign’s messaging and incentives. Coupon Code Personalization Personalize coupon codes to make customers feel valued. Use their names or preferences in the codes to create a more engaging and intimate shopping experience. Limited-Time Offers Create urgency with time-bound campaigns. Limited-time offers encourage customers to make a purchase quickly, increasing conversion rates. Leveraging Analytics Regularly monitor the performance of your coupon campaigns using WooCommerce’s analytics tools. Analyze which campaigns are driving the most sales and adjust your strategy accordingly. Best Practices for WooCommerce Coupon Campaigns Mobile Optimization Ensure that your coupon campaigns are mobile-friendly. A significant portion of online shoppers use mobile devices, so your offers must be accessible and appealing on small screens. A/B Testing Experiment with different discount types, values, and messaging through A/B testing. This data-driven approach helps you refine your campaigns for maximum effectiveness. Customer Segmentation Segment your customer base to provide tailored offers. Targeted promotions are more likely to resonate with specific groups of customers. Social Media Promotion Leverage your social media channels to promote your coupon campaigns. Engaging posts and stories can create buzz and drive traffic to your online store. Conclusion In conclusion, WooCommerce Coupon Campaigns Premium is a powerful tool in your e-commerce arsenal. By understanding the different types of discounts, crafting effective campaigns, and following best practices, you can boost your sales and engage your customers more effectively. Stay ahead of the competition by embracing the versatility and potential of WooCommerce coupon campaigns.
WooCommerce Cost Of Goods 2.14.1
WooCommerce Cost Of Goods Are you an online business owner using WooCommerce to power your e-commerce store? If so, you’re probably aware of the various features and extensions available to enhance your selling experience. One such crucial feature is the WooCommerce Cost of Goods. In this article, we will explore what Cost of Goods is, its importance, and how it can benefit your business. Table of Contents Introduction What is the Cost of Goods? Why is the Cost of Goods important? How to calculate the Cost of Goods Benefits of using the Cost of Goods Integrating the Cost of Goods with WooCommerce Maximizing profitability with Cost of Goods Best practices for managing Cost of Goods Conclusion Introduction When running an e-commerce store, understanding the financial aspects of your business is essential. The Cost of Goods (COG) refers to the total expenses incurred to produce or acquire the products you sell. It takes into account factors such as manufacturing costs, raw materials, labor, packaging, shipping, and any other expenses directly related to the creation and delivery of your products. What is the Cost of Goods? The Cost of Goods is a fundamental metric that helps you determine the profitability of your business. By accurately tracking and analyzing your COG, you can make informed decisions about pricing, profit margins, and overall business strategy. WooCommerce provides a dedicated extension called “WooCommerce Cost of Goods” that simplifies the process of managing and calculating these costs within your store. Why is the Cost of Goods important? Understanding the Cost of Goods is crucial for several reasons. Firstly, it allows you to set appropriate pricing for your products. By knowing the expenses associated with each item, you can ensure that your selling price covers these costs while still remaining competitive in the market. Secondly, the Cost of Goods helps you evaluate your profit margins accurately. By subtracting the COG from the revenue generated by product sales, you can determine the actual profit you are making. This information enables you to identify which products are most profitable and make data-driven decisions to optimize your product offerings. Lastly, the Cost of Goods provides insights into the overall health and financial performance of your business. By monitoring and managing these costs, you can identify areas where expenses can be reduced, inefficiencies can be addressed, and profitability can be improved. How to calculate the Cost of Goods Calculating the Cost of Goods involves gathering data related to the various expenses incurred during the production or acquisition of your products. Here is a step-by-step process to help you calculate the COG: Determine direct costs: Start by identifying the direct costs associated with each product. These may include manufacturing costs, raw materials, labor, and packaging. Include indirect costs: Consider any indirect costs that are necessary for your business operations, such as shipping, import taxes, and packaging materials. Calculate total costs: Add up all the direct and indirect costs to arrive at the total cost for each product. Divide costs by quantity: Divide the total costs by the quantity of products to calculate the average Cost of Goods for each unit. By following this calculation method, you can gain a clear understanding of the expenses incurred for each product and make informed decisions regarding pricing and profitability. Benefits of using the Cost of Goods Integrating the WooCommerce Cost of Goods extension into your online store offers several benefits. Let’s explore some of the key advantages: Accurate pricing: With the Cost of Goods feature, you can set prices that cover your expenses and ensure a healthy profit margin. Profit analysis: By understanding the actual profit margins of your products, you can focus on promoting and selling items that generate the most revenue. Inventory management: The Cost of Goods helps you make informed decisions regarding inventory levels, restocking, and order fulfillment. Performance tracking: With COG data, you can track the financial performance of your business over time, identify trends, and take proactive measures to improve profitability. Integrating the Cost of Goods with WooCommerce To harness the benefits of the Cost of Goods feature, you need to integrate it with your WooCommerce store. Here’s how you can do it: Install the extension: Purchase and install the “WooCommerce Cost of Goods” extension from the official WooCommerce marketplace. Configure settings: Once installed, navigate to the extension settings and configure them according to your business requirements. This includes specifying the types of costs to consider and defining cost calculation methods. Enter product costs: For each product in your store, enter the relevant costs in the WooCommerce product settings. This information will be used to calculate the Cost of Goods accurately. Analyze and optimize: Regularly review the Cost of Goods data provided by the extension and analyze its impact on your business. Use this information to optimize pricing, profit margins, and overall store performance. By seamlessly integrating the Cost of Goods extension with WooCommerce, you can effectively manage and track your product costs, leading to improved profitability and informed decision-making. Maximizing profitability with Cost of Goods To maximize profitability using the Cost of Goods feature, consider the following tips: Monitor and adjust pricing: Regularly evaluate your pricing strategy to ensure that it aligns with your COG and profit goals. Adjust prices as necessary to maintain a healthy profit margin. Streamline operations: Identify areas where you can reduce costs or improve efficiency. This could involve optimizing your supply chain, negotiating better deals with suppliers, or automating certain processes. Focus on high-profit items: Identify which products generate the highest profit margins and allocate resources to promote and sell those items more effectively. Optimize inventory management: Use the Cost of Goods data to make informed decisions about inventory levels, reordering, and stock rotation. Minimize excess inventory and avoid stockouts to maximize profitability. By implementing these strategies and leveraging the insights provided by the Cost of Goods feature, you can significantly enhance the profitability of your WooCommerce store. Best practices for managing Cost of Goods To make the most out of the Cost of Goods feature in WooCommerce, here are some best practices to follow: Regularly update costs: Ensure that your product costs are up to date and accurately reflect the expenses associated with each item. Regularly review and update these costs as needed. Periodically review pricing: Regularly assess your pricing strategy based on market trends, competitor analysis, and changes in your own costs. Adjust prices to maintain competitiveness while maximizing profitability. Analyze profit margins: Continuously monitor the profit margins of your products to identify areas for improvement. Explore ways to reduce costs and increase revenue to enhance profitability. Leverage reporting tools: Take advantage of reporting tools provided by the Cost of Goods extension to gain insights into product performance, cost trends, and profitability. Use this information to make data-driven decisions. Conclusion Understanding and effectively managing the Cost of Goods is crucial for running a successful e-commerce business. By integrating the WooCommerce Cost of Goods extension into your online store, you can accurately calculate, track, and analyze your product costs, leading to optimized pricing, improved profit margins, and enhanced overall profitability. Don’t overlook this essential feature—take control of your business finances and drive success with WooCommerce Cost of Goods.

WooCommerce Coupon Box 2.1.4
WooCommerce Coupon Box: Boosting Sales and Customer Loyalty In the world of e-commerce, where competition is fierce and consumers are always on the lookout for the best deals, WooCommerce Coupon Boxes have emerged as a powerful tool for driving sales and enhancing customer loyalty. In this article, we will explore the ins and outs of WooCommerce Coupon Boxes, how to make the most of them, and why they are crucial for any e-commerce business. Understanding WooCommerce Coupon Box WooCommerce Coupon Box is a feature that allows e-commerce businesses to offer discounts and coupons to their customers during the checkout process. These digital coupons are a powerful incentive for customers to complete their purchases, as they see immediate savings on their orders. WooCommerce Coupon Boxes can be customized to display various offers, including percentage discounts, fixed-amount discounts, and free shipping. Benefits of WooCommerce Coupon Box Boosting Sales: One of the primary benefits of using WooCommerce Coupon Boxes is the immediate boost in sales. Customers are more likely to make a purchase when they see an opportunity to save money. Enhancing Customer Loyalty: By offering discounts to existing customers, you can strengthen their loyalty to your brand, encouraging them to return for future purchases. Increasing Conversion Rates: WooCommerce Coupon Boxes can significantly improve conversion rates by reducing cart abandonment. Customers are less likely to leave their carts when they have a coupon code. Clearing Old Inventory: Coupon boxes are an excellent way to clear out old or slow-selling inventory. You can create targeted coupons for specific products to encourage their purchase. Attracting New Customers: Offering first-time buyers a discount through the coupon box can entice them to make their first purchase and become loyal customers. How to Implement WooCommerce Coupon Box Setting up a WooCommerce Coupon Box in your e-commerce store is a straightforward process: Install and Activate: Install the WooCommerce plugin and activate it on your WordPress website. Create Coupons: Go to the WooCommerce Coupons section and create your desired coupons with unique codes. Configure Settings: Customize the coupon box settings, including its appearance, position, and behavior. Display Conditions: Set conditions for when the coupon box should appear, such as cart value, specific products, or user roles. Promotion: Promote your coupons through your website, email campaigns, and social media. Best Practices for Using WooCommerce Coupon Box To get the most out of your WooCommerce Coupon Box, consider these best practices: Limited-Time Offers: Create a sense of urgency with limited-time coupon codes to prompt immediate action. Segmentation: Target specific customer segments with personalized coupons. A/B Testing: Experiment with different offers and designs to determine what resonates best with your audience. Cross-Promotion: Promote your coupons on social media and other marketing channels. Measuring Success To gauge the effectiveness of your WooCommerce Coupon Box, monitor key performance indicators such as increased sales, coupon redemption rates, and customer feedback. Use this data to refine your coupon strategies and improve results over time. Common Mistakes to Avoid While WooCommerce Coupon Boxes can be highly effective, they are not without their pitfalls. Avoid these common mistakes: Offering overly complicated coupons. Neglecting to update and refresh your coupon offers. Ignoring the legal aspects and terms and conditions. Failing to track and measure coupon performance. WooCommerce Coupon Box and SEO Optimizing your coupon box content for search engines is vital for visibility. Incorporate relevant keywords in the coupon descriptions, and make sure that metadata is well-crafted. This will improve the chances of your coupons appearing in search results. Customer Feedback and Testimonials Customer feedback and testimonials can enhance the trustworthiness of your coupons. Encourage satisfied customers to leave reviews or share their experiences with your coupons. These positive endorsements can influence others to take advantage of your offers. Case Studies Let’s explore some real-world case studies of e-commerce businesses that have achieved remarkable success with WooCommerce Coupon Boxes. These examples will demonstrate the tangible benefits of using this feature effectively. Integrating Social Media Leverage social media platforms to promote your WooCommerce Coupon Box. Share coupon codes, special promotions, and exclusive discounts on your social profiles to reach a broader audience and engage with your customers. WooCommerce Coupon Box Plugins If you’re looking to enhance the functionality of your WooCommerce Coupon Box, consider using popular plugins like “WooCommerce Coupon Box” or “Coupon Creator.” These plugins offer additional features and customization options to make your coupon box more attractive and effective. Legal Aspects It’s essential to be aware of the legal aspects when using WooCommerce Coupon Boxes. Ensure that your coupons have clear terms and conditions, including expiration dates and restrictions. Failing to do so can lead to legal issues and a loss of trust among customers. Coupon Box Design The design of your coupon box is crucial. Make it visually appealing and easy to use. A well-designed coupon box can significantly impact its effectiveness in converting visitors into customers. Conclusion In the world of e-commerce, WooCommerce Coupon Boxes have become indispensable for increasing sales, improving customer loyalty, and boosting conversion rates. By implementing best practices, measuring performance, and avoiding common mistakes, e-commerce businesses can harness the full potential of coupon boxes to enhance their success. For more insights and tips on e-commerce and WooCommerce Coupon Boxes, don’t forget to explore our blog. And if you’re ready to supercharge your e-commerce business, start using WooCommerce Coupon Boxes today!
WooCommerce Conditional Shipping and Payments 1.9.5
WooCommerce Conditional Shipping and Payments Introduction In the world of e-commerce, WooCommerce has emerged as a popular platform for building online stores. It provides a robust framework that allows businesses to customize their websites and offer a seamless shopping experience to their customers. One of the key features of WooCommerce is its ability to set up conditional shipping and payment methods. This article will explore the concept of conditional shipping and payments in WooCommerce, discussing how they work, their benefits, and how you can implement them on your online store. Table of Contents What is WooCommerce Conditional Shipping and Payments? Why Should You Use Conditional Shipping and Payments? Setting Up Conditional Shipping Methods in WooCommerce Creating Conditional Payment Methods in WooCommerce Best Practices for Using Conditional Shipping and Payments Integrating WooCommerce Conditional Shipping and Payments with Third-Party Plugins Optimizing Conditional Shipping and Payments for Mobile Devices Testing and Debugging Conditional Shipping and Payments in WooCommerce Security Considerations for Conditional Shipping and Payments Troubleshooting Common Issues with Conditional Shipping and Payments Case Study: How a Store Improved Conversion Rates with Conditional Shipping and Payments Tips for Effective Marketing with Conditional Shipping and Payments Future Trends in WooCommerce Conditional Shipping and Payments Conclusion What is WooCommerce Conditional Shipping and Payments? WooCommerce Conditional Shipping and Payments is a feature that allows you to define specific shipping and payment methods based on certain conditions. Instead of offering all available options to every customer, you can create rules and restrictions that determine which methods are displayed at the checkout process. Why Should You Use Conditional Shipping and Payments? Conditional shipping and payments provide numerous benefits to both store owners and customers. By tailoring the available options based on specific conditions, you can enhance the user experience, streamline the checkout process, and increase conversion rates. Additionally, it allows you to offer personalized shipping and payment choices to different customer groups or based on order characteristics such as weight, destination, or total value. Setting Up Conditional Shipping Methods in WooCommerce To set up conditional shipping methods in WooCommerce, follow these steps: Install and activate the WooCommerce plugin. Navigate to the WooCommerce settings and click on the “Shipping” tab. Add the desired shipping methods and configure their general settings. Scroll down to the “Shipping Zones” section and create different zones based on customer locations. Within each zone, click on the “Add Shipping Method” button and select the method you want to conditionally enable. Configure the conditions for each shipping method using the provided options. Save your changes and test the checkout process to ensure the conditional shipping methods work as expected. Creating Conditional Payment Methods in WooCommerce To create conditional payment methods in WooCommerce, follow these steps: Go to the WooCommerce settings and click on the “Payments” tab. Enable the desired payment gateways and configure their settings. Scroll down to the “Conditional Payment Methods” section. Add the conditions that determine when each payment method should be available. Specify the rules based on customer roles, order total, or other factors. Save your changes and test the checkout process to verify the conditional payment methods are applied correctly. Best Practices for Using Conditional Shipping and Payments When implementing conditional shipping and payments, consider the following best practices: Keep the options simple and relevant: Only display shipping and payment methods that are necessary for your customers. Use clear and concise conditions: Ensure that the conditions for enabling specific methods are easy to understand and align with your business requirements. Regularly review and update the conditions: As your business evolves, periodically review and adjust the conditional rules to optimize the customer experience. Test thoroughly: Before making conditional shipping and payments live, extensively test them to identify and resolve any potential issues. Integrating WooCommerce Conditional Shipping and Payments with Third-Party Plugins WooCommerce offers a wide range of extensions and plugins that can further enhance the functionality of conditional shipping and payments. By integrating with third-party solutions, you can unlock additional features such as advanced rule builders, dynamic pricing, and compatibility with specific carriers or payment gateways. Consider exploring the available options to find the plugins that best suit your business needs. Optimizing Conditional Shipping and Payments for Mobile Devices As mobile shopping continues to grow, it’s essential to optimize your conditional shipping and payments for mobile devices. Ensure that the checkout process is mobile-friendly, with responsive design and intuitive navigation. Test the user experience on different mobile devices and make necessary adjustments to guarantee a seamless and convenient purchase journey for your mobile customers. Testing and Debugging Conditional Shipping and Payments in WooCommerce When implementing conditional shipping and payments, thorough testing and debugging are crucial. Use test orders and simulate different scenarios to ensure that the correct methods are displayed based on the specified conditions. Monitor the checkout process and address any issues promptly to prevent potential cart abandonment or frustration among your customers. Security Considerations for Conditional Shipping and Payments While conditional shipping and payments provide flexibility and customization, it’s important to consider security aspects. Ensure that any sensitive customer information, such as payment details, is handled securely. Regularly update your WooCommerce and plugin versions to benefit from the latest security patches and maintain a secure environment for your online store. Troubleshooting Common Issues with Conditional Shipping and Payments In case you encounter any issues with conditional shipping and payments, here are some common troubleshooting steps: Double-check your conditions: Verify that the conditions are correctly set up and aligned with your intended rules. Check for conflicts with other plugins: Deactivate other WooCommerce extensions temporarily to identify potential conflicts that may interfere with conditional shipping and payments. Review error logs: Examine the error logs to gather information about any specific errors or warnings related to conditional shipping and payments. Reach out to support: If you’re unable to resolve the issue, contact the support teams of WooCommerce or the related plugins for further assistance. Case Study: How a Store Improved Conversion Rates with Conditional Shipping and Payments ABC Store, an online clothing retailer, implemented conditional shipping and payments on their WooCommerce website. By offering free shipping for orders above $50 and enabling a preferred payment gateway for their loyal customers, they witnessed a significant increase in conversion rates. The personalized approach and streamlined checkout process resulted in improved customer satisfaction and higher sales for the store. Tips for Effective Marketing with Conditional Shipping and Payments To leverage conditional shipping and payments for effective marketing, consider the following tips: Highlight unique shipping options: Promote any special shipping methods you offer, such as same-day delivery or international express shipping. Communicate cost-saving opportunities: Emphasize how customers can save on shipping fees through specific conditions, such as free shipping thresholds or discounted rates for bulk orders. Showcase payment convenience: Highlight the availability of popular payment gateways or the ease of using digital wallets for a frictionless checkout experience. Leverage personalized offers: Utilize conditional payment methods to offer exclusive discounts or rewards for specific customer segments, encouraging repeat purchases. Future Trends in WooCommerce Conditional Shipping and Payments As e-commerce continues to evolve, we can expect further advancements in conditional shipping and payments within the WooCommerce ecosystem. Some potential future trends include: AI-driven rules and recommendations: Leveraging artificial intelligence to analyze customer data and provide intelligent suggestions for optimal conditional shipping and payment configurations. Dynamic pricing based on real-time factors: Implementing dynamic pricing models that consider factors like inventory levels, demand fluctuations, and competitor pricing to offer personalized shipping and payment options. Enhanced integration with logistics providers: Strengthening partnerships between WooCommerce and logistics companies to provide seamless order fulfillment, real-time tracking, and accurate shipping cost calculations. Conclusion WooCommerce Conditional Shipping and Payments empower online store owners to create a tailored shopping experience for their customers. By implementing rules and restrictions based on various conditions, you can streamline the checkout process, increase conversion rates, and offer personalized shipping and payment options. Keep in mind the best practices, regularly test and optimize your configurations, and explore the potential of integrating with third-party plugins to maximize the benefits of conditional shipping and payments on your WooCommerce store.
WooCommerce Conditional Product Fields at Checkout 6.2
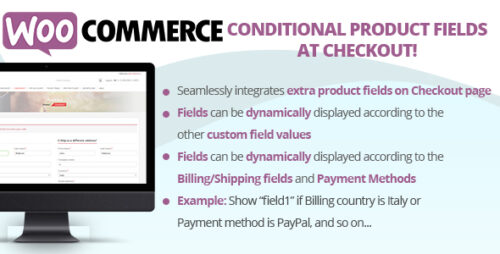
WooCommerce Conditional Product Fields at Checkout In the dynamic world of e-commerce, where customer preferences and needs vary widely, it’s crucial to offer a seamless and personalized shopping experience. WooCommerce, a leading WordPress plugin for online stores, has stepped up its game with the introduction of Conditional Product Fields at Checkout. This innovative feature empowers store owners to collect specific information from customers during the checkout process, tailoring it to their unique requirements. In this article, we’ll delve into the significance and functionality of WooCommerce Conditional Product Fields at Checkout. Understanding Conditional Product Fields What Are Conditional Product Fields? Conditional Product Fields are extra form fields that can be added to the checkout page, allowing merchants to gather additional information from customers. The unique aspect of these fields is their conditional nature – they appear based on predefined rules. This means you can present customers with relevant questions based on their selections, streamlining the checkout process and enhancing user satisfaction. Why Are They Essential? In the world of online shopping, generic experiences no longer suffice. Customers appreciate personalization and efficiency. Conditional Product Fields cater to both these aspects. By asking targeted questions, you’re not only showing that you care about their preferences but also reducing friction during checkout. This can lead to higher conversion rates and reduced cart abandonment. Implementing Conditional Product Fields Simple Steps to Get Started Install the WooCommerce Plugin: Before anything else, make sure you have the WooCommerce plugin installed and activated on your WordPress website. Add a New Field: In the WooCommerce settings, navigate to the Checkout tab and click on “Add Field.” Here, you can create your custom field and define its conditional rules. Set Conditions: You have the flexibility to set conditions based on various parameters like products in the cart, product quantities, or even customer roles. For instance, you can show a field for engraving details only if a customer adds a piece of jewelry to their cart. Enhancing User Experience Segmented Questions: Break down information collection into logical segments. For instance, if you sell both physical and digital products, you can gather shipping details only if a physical product is in the cart. Clear Instructions: Ensure that the purpose of each field is clearly explained. Use concise yet friendly language to guide customers through the process. Error Handling: Implement smart error handling. If a customer selects a certain option that requires additional information, but they haven’t filled it out, display a friendly reminder. Benefits and Impact Personalization Boosts Conversion The ability to present customers with personalized questions creates a sense of care and attention to detail. When shoppers feel valued, they’re more likely to complete their purchase. Conditional Product Fields provide the perfect platform for this kind of personalized interaction. Streamlined Checkout Process Long and tedious checkout processes are notorious for cart abandonment. By strategically incorporating conditional fields, you’re reducing the number of irrelevant questions customers need to answer, making the process smoother and quicker. Accurate Data Collection Collecting pertinent information at the right time ensures accurate data. This data can be utilized for various purposes, such as refining marketing strategies, understanding customer preferences, and enhancing product offerings. Conclusion In the ever-evolving landscape of e-commerce, staying ahead requires innovative solutions. WooCommerce’s Conditional Product Fields at Checkout not only offer a competitive edge but also pave the way for a customer-centric shopping experience. By seamlessly integrating personalized questions, you’re not only increasing conversion rates but also fostering customer loyalty. So, take the leap, embrace personalization, and witness the transformation in your online store’s performance.
WooCommerce Conditional Shipping & Payments 2.0.4
WooCommerce Conditional Shipping & Payments: A Game-Changer for Your E-Commerce Store In the fast-paced world of e-commerce, providing a seamless shopping experience for your customers is paramount. WooCommerce, the popular WordPress plugin for e-commerce websites, has introduced a powerful feature that can significantly enhance how you handle shipping and payments on your online store. Enter WooCommerce Conditional Shipping & Payments – a game-changer that allows you to customize and optimize these crucial aspects of your business. In this article, we will explore the ins and outs of WooCommerce Conditional Shipping and Payments and how they can revolutionize your online store. What is WooCommerce Conditional Shipping & Payments? WooCommerce Conditional Shipping & Payments is an extension for WooCommerce that empowers you with the ability to set conditions and rules for shipping methods and payment gateways. This means you can tailor the shipping and payment options available to your customers based on various factors and criteria, making the shopping experience more convenient and efficient. How Does It Work? This extension integrates seamlessly with your WooCommerce store, offering a user-friendly interface to configure the conditions. You can define rules based on parameters such as: 1. Cart Contents You can set rules to trigger specific shipping methods or payment gateways when certain items are in the customer’s cart. For example, if a customer has fragile items in their cart, you can offer them a premium shipping option with added protection. 2. Customer Location WooCommerce Conditional Shipping & Payments allows you to set rules based on the customer’s location. This is especially useful for international businesses. For instance, you can offer different shipping rates for customers in other countries or regions. 3. Order Total You can create rules based on the total amount of the order. For example, if a customer’s order exceeds a certain amount, you can provide them with free shipping as an incentive to purchase more. 4. User Roles This feature is handy for membership-based websites. You can assign specific shipping or payment options to different user roles. For instance, premium members can enjoy exclusive payment gateways or shipping perks. 5. Date and Time You can schedule rules to be active during specific dates or times. This is particularly useful for running promotions or limited-time offers. Why Should You Consider WooCommerce Conditional Shipping & Payments? 1. Enhanced User Experience You can provide a personalized and user-centric shopping experience by offering tailored shipping and payment options. Customers appreciate having choices that align with their preferences and needs. 2. Increased Conversions When customers find convenient and relevant shipping and payment options, they are more likely to complete their purchase. This can lead to higher conversion rates and increased revenue for your e-commerce store. 3. Improved Customer Satisfaction Meeting customer expectations regarding shipping and payment is crucial for building trust and loyalty. WooCommerce Conditional Shipping & Payments helps you meet these expectations effectively. 4. Streamlined Operations Automating the process of assigning shipping methods and payment gateways based on predefined rules reduces manual intervention and ensures accuracy in order processing. Getting Started with WooCommerce Conditional Shipping & Payments To start using WooCommerce Conditional Shipping & Payments, follow these simple steps: Install the Extension: Purchase and install the WooCommerce Conditional Shipping & Payments extension from the WooCommerce website. Configuration: Access the extension’s settings in your WordPress dashboard and configure the rules that best suit your business needs. Testing: Before implementing the rules on your live site, it’s advisable to test them thoroughly to ensure they work as intended. Monitor and Adjust: Regularly monitor the performance of your shipping and payment options. Make adjustments as needed to optimize the user experience further. Conclusion WooCommerce Conditional Shipping & Payments is a remarkable tool that can transform the way you handle shipping and payments on your e-commerce website. By providing customized options that align with customer preferences and business goals, you can enhance user experience, boost conversions, and improve overall customer satisfaction. Leap and explore the possibilities this extension offers to stay ahead in the competitive world of e-commerce.

WooCommerce Conditional Content 2.3.1
WooCommerce Conditional Content: Tailoring Your Online Store’s Experience In the vast and competitive world of e-commerce, customization is key to standing out and meeting the unique needs of your customers. WooCommerce, the popular WordPress plugin, empowers online store owners with a myriad of features, and one of the most powerful among them is conditional content. In this article, we’ll explore the ins and outs of WooCommerce conditional content, showing you how to use it to enhance your store’s user experience. What is WooCommerce Conditional Content? Before we dive into the details, let’s define what WooCommerce conditional content is. Simply put, it’s a feature that allows you to display specific content to customers based on predefined conditions. This content can range from text and images to entire product categories or pricing deals. Why Should You Use WooCommerce Conditional Content? 1. Personalized Shopping Experience One of the primary advantages of using conditional content is the ability to create a personalized shopping experience for your customers. By showing them products, offers, or information tailored to their preferences and behavior, you increase the chances of conversion. 2. Seasonal Promotions With WooCommerce conditional content, you can effortlessly run seasonal promotions. For instance, you can set up a condition to display winter clothing when the temperature drops below a certain point. This keeps your store relevant and appealing throughout the year. 3. Membership Benefits Rewarding loyal customers is crucial for retaining them. Conditional content allows you to display exclusive offers or content to members, encouraging them to stay engaged with your brand. How to Use WooCommerce Conditional Content Now that you understand the ‘what’ and ‘why,’ let’s delve into the ‘how.’ Below, we’ll walk you through the process of implementing WooCommerce conditional content on your online store. 1. Install and Activate WooCommerce If you haven’t already, install the WooCommerce plugin on your WordPress website and activate it. This is the foundation for setting up conditional content. 2. Install a Conditional Content Plugin To unlock the power of conditional content, you’ll need a dedicated plugin. Some popular options include ‘Conditional WooCommerce Checkout Field’ and ‘Conditional Content for WooCommerce.’ Install and activate your chosen plugin. 3. Configure Your Conditions Now, it’s time to set your conditions. Decide when and where you want specific content to appear. You can create rules based on user roles, cart contents, purchase history, and more. Experiment with different conditions to see what works best for your store. 4. Create Custom Content With your conditions in place, create custom content for each scenario. This can include product descriptions, banners, or even entire landing pages. Make sure the content is engaging and relevant to the condition it corresponds to. 5. Monitor and Optimize After implementing conditional content, monitor its performance. Use analytics to track how different conditions impact user behavior and sales. Adjust your strategy as needed to optimize the customer experience. Conclusion WooCommerce conditional content is a powerful tool that can elevate your online store to new heights. By delivering personalized experiences, running seasonal promotions, and rewarding loyal customers, you can increase conversions and build a stronger brand presence. Implement these strategies wisely, and watch your e-commerce venture thrive.
WooCommerce Composite Products 10.6.0
WooCommerce Composite Products: A Comprehensive Guide to Creating Customizable Product Bundles Are you looking for a way to offer your customers personalized and customizable product options? Look no further than WooCommerce Composite Products! In this article, we will explore the power of WooCommerce Composite Products and how they can enhance your online store’s offerings. From understanding the basics to implementing them effectively, we’ve got you covered. Table of Contents Introduction: What are WooCommerce Composite Products? Why Use WooCommerce Composite Products? Setting Up WooCommerce Composite Products Installing the WooCommerce Composite Products Plugin Configuring Product Options Creating Product Bundles Advanced Features and Customizations Conditional Logic Pricing and Inventory Management Custom Styling Integrating with Third-Party Plugins Best Practices for Creating Effective Composite Products Simplify the User Interface Offer Clear Product Descriptions and Images Streamline the Checkout Process Test and Iterate Real-Life Examples of WooCommerce Composite Products The Future of WooCommerce Composite Products Conclusion 1. Introduction: What are WooCommerce Composite Products? WooCommerce Composite Products is a powerful extension that allows you to create customizable product bundles in your WooCommerce store. It enables you to offer a selection of components or options that customers can choose from to create their own unique combinations. Whether you sell customizable gift sets, build-your-own kits, or personalized products, WooCommerce Composite Products provides a seamless solution. 2. Why Use WooCommerce Composite Products? WooCommerce Composite Products offer several advantages for both store owners and customers. By leveraging this feature, you can: Enhance customer experience: Empower your customers to personalize their purchases, leading to higher customer satisfaction and engagement. Increase sales: Offering customizable product bundles can upsell and cross-sell, boosting your revenue. Streamline inventory management: Instead of managing individual components, you can handle composite products as a whole, simplifying inventory tracking. Save time and effort: With WooCommerce Composite Products, you can automate the process of creating and managing complex product bundles. 3. Setting Up WooCommerce Composite Products Installing the WooCommerce Composite Products Plugin To get started, you’ll need to install and activate the WooCommerce Composite Products plugin. Here’s how: Log in to your WordPress dashboard. Go to “Plugins” > “Add New.” Search for “WooCommerce Composite Products.” Click “Install Now” and then “Activate.” Configuring Product Options Once the plugin is activated, you can configure the product options to create compelling bundles. Follow these steps: Go to “Products” > “Add New” to create a new product or edit an existing one. Scroll down to the “Product Data” section. Select the “Composite” product type. Define the component options, such as color, size, or material. Set rules and dependencies for the components if necessary. Creating Product Bundles After configuring the product options, you can start building product bundles. Here’s how: Create a new product or edit an existing one. Scroll down to the “Composite Product” section. Click on “Add Component” to add the desired options. Define the quantity, pricing, and other parameters for each component. Customize the layout and appearance of the composite product if needed. 4. Advanced Features and Customizations WooCommerce Composite Products offer advanced features and customization options to tailor the user experience. Let’s explore some of them: Conditional Logic You can utilize conditional logic to control component visibility based on customer selections. This feature allows you to create dynamic product bundles, ensuring that only relevant options are displayed. Pricing and Inventory Management WooCommerce Composite Products provide flexible pricing options. You can assign prices to individual components or configure dynamic pricing based on customer selections. Additionally, inventory management can be streamlined by setting stock quantities for the composite product as a whole or for specific components. Custom Styling With custom CSS options, you can style your composite product layout to match your brand’s aesthetics. This allows for a cohesive and visually appealing shopping experience. Integrating with Third-Party Plugins WooCommerce Composite Products seamlessly integrate with various third-party plugins, expanding the functionality of your store. You can leverage plugins for additional payment gateways, shipping methods, or marketing automation. 5. Best Practices for Creating Effective Composite Products To create compelling composite products that resonate with your customers, consider the following best practices: Simplify the User Interface Keep the user interface clean and intuitive. Present options in a logical order and minimize any unnecessary complexity. A clutter-free interface leads to better user experience and increased conversions. Offer Clear Product Descriptions and Images Provide detailed descriptions and high-quality images for each component and the final composite product. Clear and enticing visuals help customers understand the value and make informed decisions. Streamline the Checkout Process Ensure that the checkout process is smooth and user-friendly. Remove any unnecessary steps or distractions that could lead to cart abandonment. A seamless checkout experience enhances customer satisfaction and boosts conversion rates. Test and Iterate Continuously monitor and analyze the performance of your composite products. Collect feedback from customers and make data-driven improvements. Regularly test and iterate to optimize the user experience and maximize sales potential. 6. Real-Life Examples of WooCommerce Composite Products Let’s take a look at a few real-life examples of how businesses have leveraged WooCommerce Composite Products: Customizable Jewelry: An online jewelry store offers customers the ability to design their own necklaces by selecting different pendants, chains, and gemstones. Build-Your-Own PC: A computer hardware retailer allows customers to choose individual components, such as processors, graphics cards, and storage, to build their own custom PCs. Gift Sets: A beauty brand offers personalized gift sets where customers can choose their preferred skincare products and fragrances. 7. The Future of WooCommerce Composite Products As the e-commerce industry continues to evolve, WooCommerce Composite Products are expected to evolve as well. We anticipate exciting advancements such as enhanced user interfaces, improved mobile experiences, and tighter integrations with emerging technologies. 8. Conclusion WooCommerce Composite Products provide an excellent opportunity to offer personalized and customizable product options to your customers. By implementing this feature effectively, you can enhance customer experience, increase sales, and simplify inventory management. Remember to follow best practices, continuously optimize your offerings, and stay updated with future developments to stay ahead in the competitive e-commerce landscape.
WooCommerce Checkout Upsell Funnel – Order Bump 1.0.9
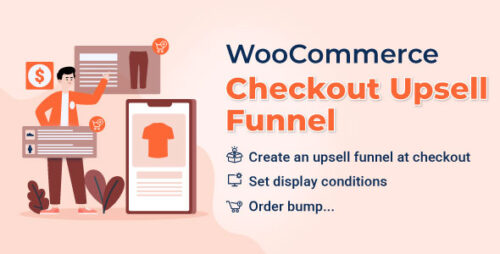
WooCommerce Checkout Upsell Funnel – Order Bump In the dynamic world of e-commerce, businesses are continually exploring innovative strategies to enhance their revenue streams and provide customers with an improved shopping experience. One such strategy gaining traction is the WooCommerce Checkout Upsell Funnel, specifically through a technique known as “Order Bump.” In this article, we’ll delve into the concept of WooCommerce Checkout Upsell Funnels and how the Order Bump strategy can effectively boost sales and improve customer satisfaction. What is a WooCommerce Checkout Upsell Funnel? The WooCommerce Checkout Upsell Funnel is a strategic approach that leverages the checkout process to offer additional products or services to customers before they finalize their purchases. It’s a way to maximize the value of each transaction by enticing customers to add more items to their cart, enhancing the overall order value. Understanding the Order Bump Technique The Order Bump technique is a pivotal component of the WooCommerce Checkout Upsell Funnel. It involves presenting customers with a carefully selected complementary or relevant product at the point of checkout. This technique capitalizes on the customer’s existing buying intent, increasing the likelihood of them accepting the additional offer. How Does the Order Bump Work? Imagine a scenario where a customer is purchasing a digital camera. As they proceed to the checkout page, the Order Bump strategy would display a related product, such as a camera lens or a protective case, with a persuasive offer. The customer can then conveniently add this extra item to their order with a single click. Crafting Compelling Order Bump Offers Creating effective Order Bump offers requires a deep understanding of customer preferences and behavior. The offer should be relevant, valuable, and ideally positioned to enhance the main purchase. Crafting compelling copy and visuals is crucial to convey the additional item’s benefits. Implementing the Order Bump in WooCommerce WooCommerce offers plugins and tools that make implementing the Order Bump strategy seamless. Merchants can easily set up and customize Order Bump offers within their WooCommerce store. The placement, design, and timing of the offer are essential factors to consider during implementation. The Psychology Behind Successful Upselling The psychology of upselling centers on tapping into customers’ desire for value and satisfaction. The Order Bump technique aligns with this psychology, capitalizing on the moment when customers are already in a purchasing mindset. Benefits of Using the Order Bump Strategy The Order Bump strategy offers several benefits to both merchants and customers. Merchants experience increased average order values and improved revenue, while customers enjoy personalized offers and a streamlined checkout experience. Potential Drawbacks and Mitigation While powerful, the Order Bump strategy must be implemented thoughtfully. Overloading customers with too many offers can lead to decision fatigue and cart abandonment. Strategic selection, limited choices, and clear communication are key to mitigating these drawbacks. Real-world Examples of Successful Order Bump Implementation Numerous e-commerce businesses have successfully integrated the Order Bump technique. One notable example is an online electronics retailer that boosted its sales by 20% through well-crafted Order Bump offers for accessories like cases, screen protectors, and extended warranties. A Step-by-Step Guide to Setting Up an Order Bump Identify Complementary Products: Choose products that naturally complement the main purchase. Create a Persuasive Offer: Craft compelling visuals and copy to highlight the additional product’s benefits. Configure WooCommerce Settings: Utilize plugins or built-in features to set up the Order Bump offer. Optimize Placement and Design: Ensure the offer is prominently displayed and visually appealing. Test and Iterate: Continuously monitor the offer’s performance and make adjustments as needed. Tracking and Analyzing the Effectiveness of Order Bump To measure the success of your Order Bump offers, utilize analytics tools to track metrics like conversion rates, order values, and revenue generated through upsells. This data provides insights into the strategy’s impact and areas for improvement. Optimizing and Iterating Your Upsell Offers Constant optimization is vital in maximizing the effectiveness of Order Bump offers. Analyze customer feedback and sales data to refine your offers, adapting to changing trends and preferences. Order Bump vs. Traditional Upselling – A Comparison Compared to traditional upselling, the Order Bump strategy shines through its simplicity, non-intrusiveness, and alignment with the customer’s buying journey. It offers a frictionless way to enhance sales without disrupting the checkout flow. Avoiding Common Mistakes in Implementing Order Bumps Unrelated Offers: Ensure Order Bump offers are relevant to the customer’s main purchase. Complex Checkout: Keep the checkout process simple even with added offers. Neglecting Mobile Experience: Optimize the Order Bump for mobile users’ convenience. Conclusion The WooCommerce Checkout Upsell Funnel, particularly the Order Bump technique, represents a powerful tool for e-commerce businesses seeking to optimize their sales strategy. By strategically offering complementary products during the checkout process, merchants can enhance revenue and customer satisfaction simultaneously.
WooCommerce Checkout Fields & Fees 10.3
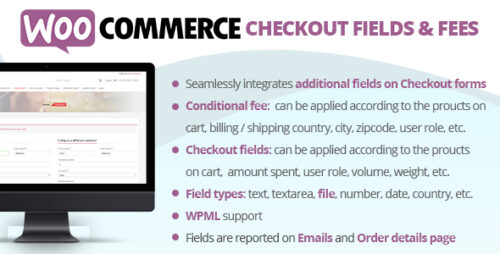
WooCommerce Checkout Fields & Fees Plugin Are you looking to optimize your WooCommerce store’s checkout process? The WooCommerce Checkout Fields & Fees Plugin is here to help. In this article, we will explore the features and benefits of this plugin, and how it can enhance your customers’ checkout experience. So let’s dive in! Introduction A smooth and efficient checkout process is crucial for online businesses. It is the final step where customers complete their purchases, and any friction or complexity in this stage can lead to cart abandonment. The WooCommerce Checkout Fields & Fees Plugin addresses these concerns by offering a range of customizable features that enhance the checkout experience. Simplifying the Checkout Process The plugin simplifies the checkout process by providing a user-friendly interface that guides customers through the necessary steps. It eliminates unnecessary fields and reduces clutter, ensuring a streamlined experience for your buyers. Customizing Checkout Fields With the WooCommerce Checkout Fields & Fees Plugin, you have the power to customize the checkout fields according to your specific requirements. You can add or remove fields, modify their labels, and make them mandatory or optional based on your business needs. Managing Additional Fees Do you offer additional services or require specific fees during the checkout process? This plugin allows you to effortlessly manage and apply additional fees for services like gift wrapping, expedited shipping, or insurance. By providing transparency and flexibility in fee management, you can boost your average order value. Streamlining User Experience The plugin is designed to enhance the overall user experience during checkout. It ensures a seamless flow, reducing the number of steps required and making it easy for customers to review and edit their order details. This smooth and intuitive process helps reduce cart abandonment rates. Boosting Conversion Rates A complicated or time-consuming checkout process can significantly impact your conversion rates. By utilizing the WooCommerce Checkout Fields & Fees Plugin, you can optimize your store’s checkout process, resulting in higher conversion rates and increased sales. Enhancing Customer Satisfaction A personalized and hassle-free checkout experience contributes to customer satisfaction. The plugin enables you to tailor the checkout fields to gather relevant information from your customers, allowing you to provide a more personalized experience and improve customer satisfaction levels. Compatibility with Other Plugins The WooCommerce Checkout Fields & Fees Plugin seamlessly integrates with other WooCommerce plugins, enabling you to leverage additional functionalities and enhance the overall performance of your online store. It provides a flexible and scalable solution for businesses of all sizes. Easy Installation and Configuration Installing and configuring the WooCommerce Checkout Fields & Fees Plugin is a breeze. With clear instructions and a user-friendly interface, you can quickly set up the plugin and start customizing your checkout fields and fees to align with your business requirements. Advanced Reporting and Analytics The plugin offers advanced reporting and analytics features, providing valuable insights into your checkout process. You can track key metrics such as conversion rates, average order value, and abandoned carts. These insights empower you to make data-driven decisions and optimize your checkout strategy further. Regular Updates and Support Rest assured that the WooCommerce Checkout Fields & Fees Plugin is regularly updated to ensure compatibility with the latest versions of WooCommerce. Additionally, a dedicated support team is available to assist you with any questions or issues you may encounter along the way. Conclusion A well-optimized checkout process is essential for every WooCommerce store. The WooCommerce Checkout Fields & Fees Plugin offers a comprehensive solution to simplify the checkout process, customize fields, manage additional fees, and improve the overall user experience. By leveraging the power of this plugin, you can enhance customer satisfaction, boost conversion rates, and increase your online sales.

WooCommerce Checkout Field Editor 1.7.18
Your Checkout Process Can Be Simplified With The WooCommerce Checkout Field Editor. Giving your customers a seamless and convenient shopping experience is crucial in the fast-paced world of e-commerce. An effective solution for online store owners is provided by WooCommerce, one of the most well-known e-commerce platforms for WordPress. The checkout procedure is one of the most important components in designing a user-friendly shopping experience. Where the WooCommerce Checkout Field Editor comes into play is in this situation. What Justifies the Need for Custom Checkout Pages? A generic checkout page might not meet the needs of your particular business. You can alter the checkout fields using the WooCommerce Checkout Field Editor to make it simpler for customers to finish their purchases. The benefits of this customization include the ability to gather vital customer data and adjust the experience to your brand’s particular needs. The WooCommerce Checkout Field Editor’s Key Features. Let’s look at this plugin’s main features before learning how to use it to its full potential. Builder using drag-and-drop: You can easily add, remove, or reorder fields on your checkout page using this user-friendly feature. different field types: Select from a variety of field types, such as text fields, checkboxes, and dropdown menus, to gather the data you require. Conditional Logic: The checkout process can be made more efficient by customizing fields based on customer responses to earlier inquiries. How to Install the WooCommerce Field Editor for the Checkout. With WooCommerce Checkout Field Editor, getting started is simple. Simply do the following. Buy and download: Get the plugin by visiting the WooCommerce Checkout Field Editor website. Afterward, download the zip file. Install and upload: Go to “Plugins” in your WordPress admin and click “Add New.”. Upload the compressed file you downloaded, then turn on the plugin. Activation of a license. To receive updates and support, enter your license key. After you’ve installed it, let’s look at how to alter your checkout page. Billing and shipping fields can be customized. The billing and shipping fields can be customized as one of the first steps in streamlining the checkout process. To suit the unique requirements of your company, you can add, remove, or reorder these fields. Custom Fields are Added to the Checkout Page. You can add custom fields using the WooCommerce Checkout Field Editor in addition to the typical billing and shipping fields. This is particularly helpful if you want to get extra details from your clients, like gift messages or special instructions. Managing the Checkout Field Display. When it comes to these custom fields during the checkout process, you have flexibility over where and when they show up. This guarantees a neat and user-friendly experience for your clients. Creating the field environment. With the help of this plugin, you can specify the circumstances under which specific fields should be shown. This increases the effectiveness of your checkout procedure and reduces the number of questions that customers needlessly ask. Making Use of Fields with Conditional Logic. You can alter fields using conditional logic depending on the responses from customers. For instance, you could restrict the display of a field for gift wrapping to customers who choose a particular item. additional data gathering from customers. There are numerous opportunities made possible by the ability to add custom fields. Data gathering can help you offer personalized goods and services, better understand your target market, and tailor your marketing campaigns. improving the experience of checking out. Making sure that your checkout page is mobile-friendly is essential. A mobile-friendly checkout process is necessary for higher conversion rates since smartphones are the most common platform for online shopping. Security issues and recommended procedures. It’s crucial to think about how secure the data is that you’re gathering through custom fields. Protecting sensitive customer data can be aided by using SSL certificates and best practices. The Troubleshooting of Common Problems. Despite being a powerful tool, WooCommerce Checkout Field Editor occasionally has problems. You can avoid wasting time and frustration by learning how to troubleshoot common issues. Conclusion. The WooCommerce Checkout Field Editor is an important tool for online store owners, to sum up. You can give your customers a more individualized and effective shopping experience by customizing the checkout procedure. This plugin can help you gather particular information or speed up the purchasing process. .